Adding a non-GoDaddy domain to your Microsoft 365 home account


One of the features of Microsoft 365 (formally Office 365) allows you to add a custom domain, i.e. yourdomain.com, to your account for you to send and receive emails. Unfortunately, as of the time of writing, Microsoft only supports domains that are registered and managed with GoDaddy which, for me at least, was a limitation. I am happy with my current registrar, and can't move my domain to GoDaddy for a number of reasons, but I did still want my emails to work through Office 365 Microsoft 365. As it turns out, it is possible - however it does involve some manual processes, particularly around DNS configuration.
First, go to outlook.com and click the diamond icon in the top right, this will bring up the premium features settings dialog:
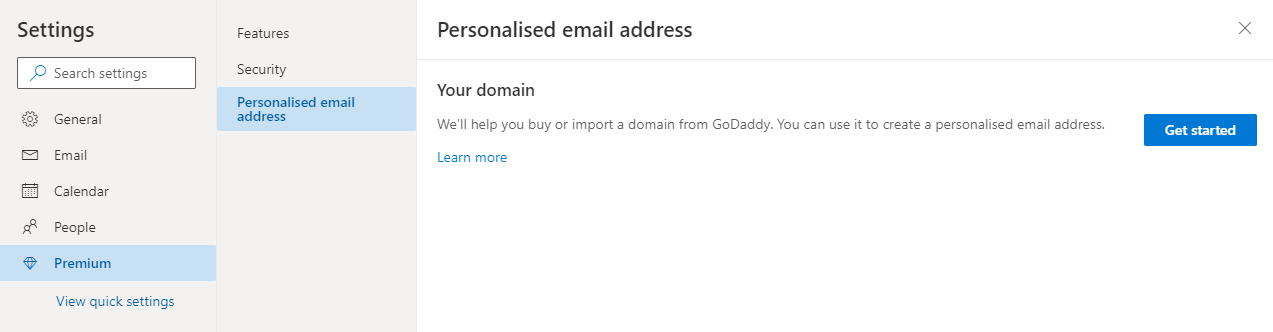
Click on the 'Personalised email address' option, which will show the screen above. Click the 'Get Started' button to bring up the domain selection dialog:
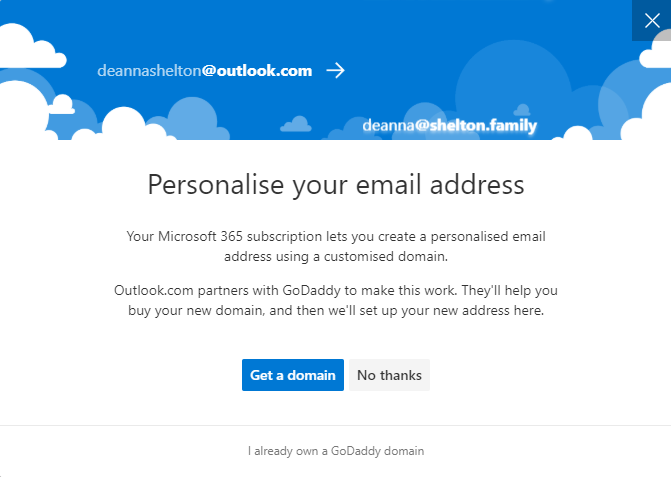
Click 'Get a domain' and it will bring up the GoDaddy registration page in a new window:
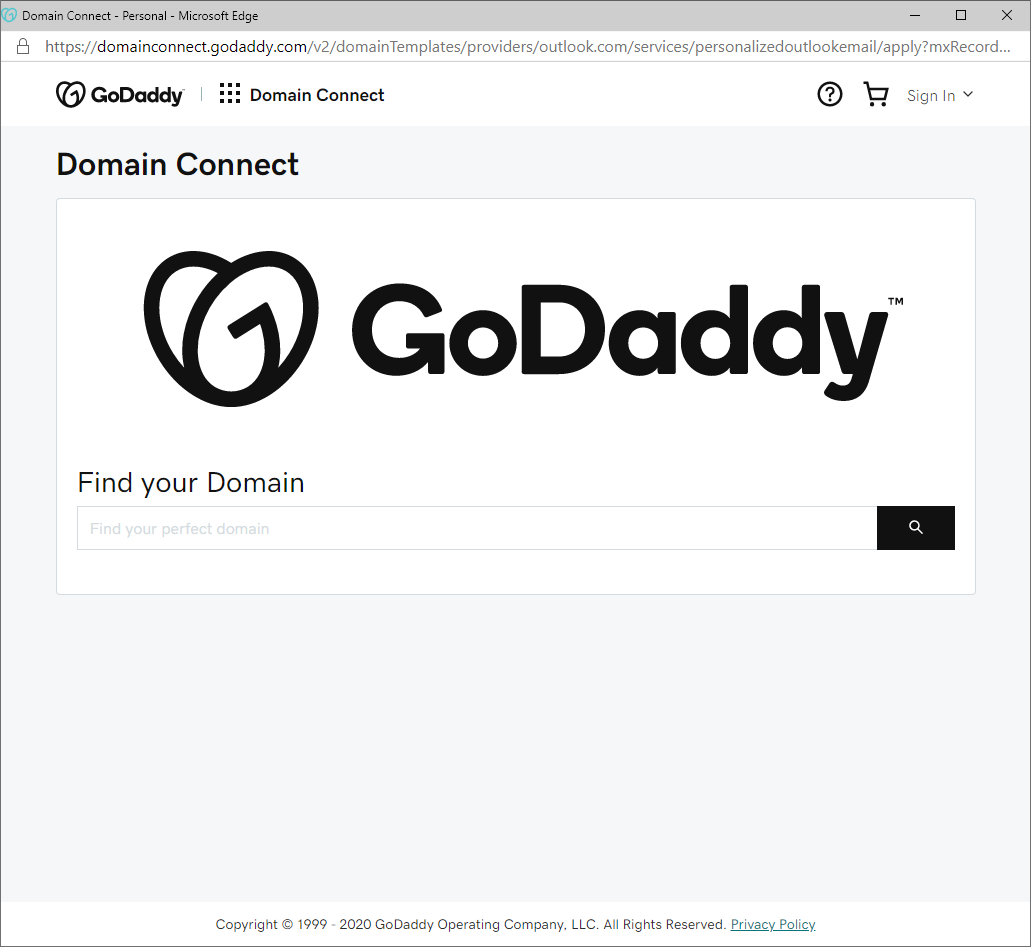
Stay on this page, and copy out the page's address, which should look something like:
https://domainconnect.godaddy.com/v2/domainTemplates/providers/outlook.com/services/personalizedoutlookemail/apply?mxRecordValue=123456789&state=xxxxxxxxxxxxxxxxxxxxx&redirect_url=https%3A%2F%2Foutlook.live.com/mail/LaunchDomainConnectNextStep.htmlWe'll need to get the number which appears after 'mxRecordValue=', in this case I have changed it to 123456789 (I have also replaced the state value with x's - so don't worry if your address looks a little different).
Make a note of the numeric mxRecordValue (123456789 in the example above), as we will need this to validate the domain. You can now close the GoDaddy popup - we have the address which is all we needed on that page.
Microsoft uses domain name validation to ensure the domain is registered correctly, my guess is that GoDaddy automates a lot of this process, so we'll need to manually add in a number of records.
In your DNS registrar, add the following records, replacing 123456789 with your mxRecordValue you got from the address in the previous step:
TYPE    NAME	        VALUE                                 TTL
CNAME	autodiscover	autodiscover.outlook.com	      1 Hour
CNAME   _domainconnect	_domainconnect.gd.domaincontrol.com   1 Hour
TXT     @	        v=spf1 include:outlook.com -all	      1 Hour
TXT	_outlook	123456789                             1 Hour
MX      @               123456789.pamx1.hotmail.com           1 Hour    Priority: 0
You may want to reduce the TTL down to the minimum while we're setting this all up, in case we make a mistake.
So, what are all these doing? The 'autodiscover' record is a record that email services use to automatically configure email clients.
The _domainconnect CNAME record is a record that GoDaddy adds to it's domain names to verify that is it managed by them. This is required else you will get an error stating that the domain name is not managed by GoDaddy.
the @ SPF record states that outlook.com is allowed to send emails on behalf of our domain. This is important as without it, emails from our domain will be marked as spam.
The _outlook TXT record verifies the domain and attaches it to our specific account by using the mxRecordValue we got previously. Make sure you replace 123456789 with your own unique value.
The MX record is what tells other email servers which email server to use, note the 123456789 value - replace with your own unique value from the steps above.
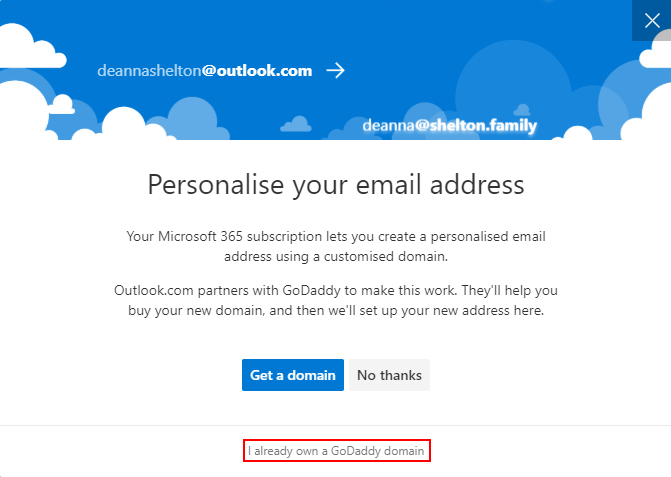
Once these five records have been added, we can go back to our outlook.com and start the domain verification process again. Click the diamond to bring up the premium features settings again, and again, click the 'Get Started' button.
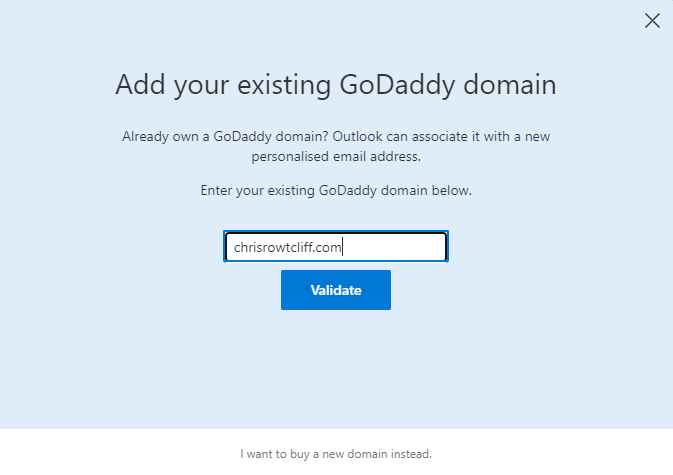
This time, when the domain selection dialog appears, click the 'I already own a domain option shown below:
In the next popup that appears, enter your domain in the box and press 'Validate':
If everything is correct with our DNS records, we should get a message saying that our domain is managed through GoDaddy and to click through to sign in and manage the domain. This will bring up a GoDaddy sign in window - we can safely close this without going any further.
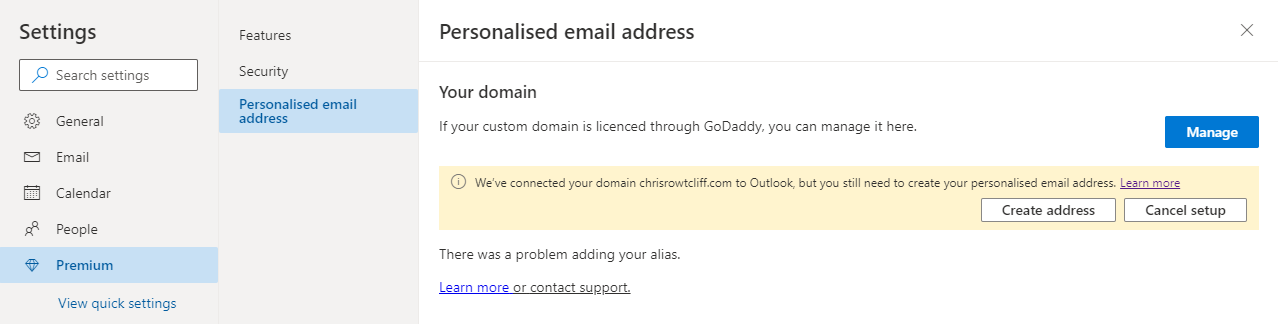
We can now go back to outlook.com, click the diamond and bring up the personalised email address settings as before, only this time we get a message saying that our domain has been connected and we are invited to create our personalised email address:
Click the 'Create address' button and we're presented the following dialog:
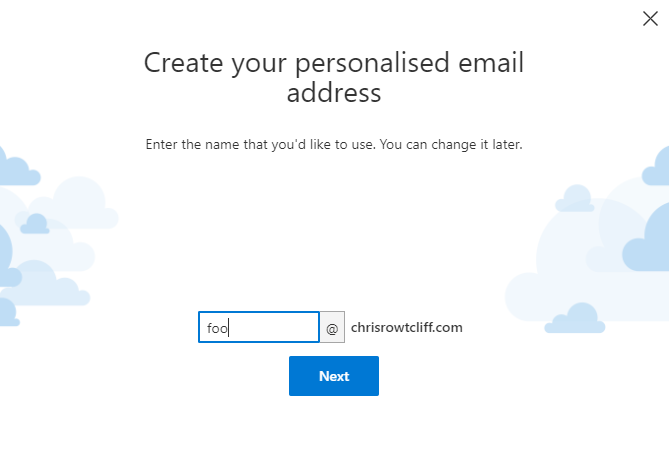
Enter your desired email address, and click next. It will take a few moments to validate the address, but then...SUCCESS:
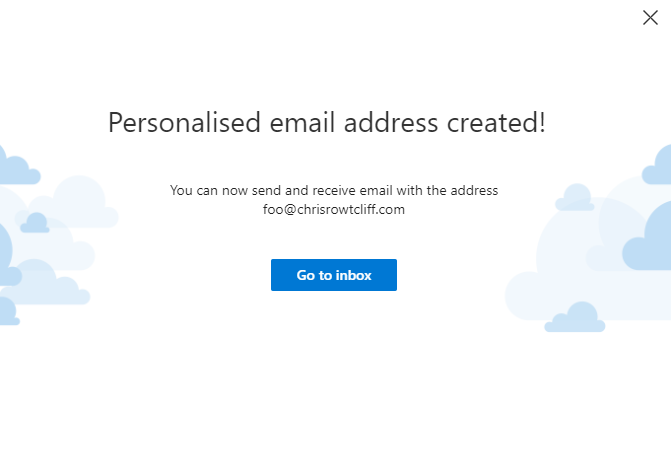
That's it!
Sometimes the changes will take a few hours to take effect - when trying to set this up initially, I made a few mistakes and had to delete the email address. This caused an error when trying to re-add the correct settings, but after waiting for a few hours it worked.
Header photo by Brett Jordan on Unsplash